1. How to create your Landing Page
Make sure to watch video #4 here: https://members.projectplatinum.com/module-2-building-your-landing-pages/
and this training video too:
2. How to connect your own domain to your site
To use your custom domain, you just need to do 3 simple steps:
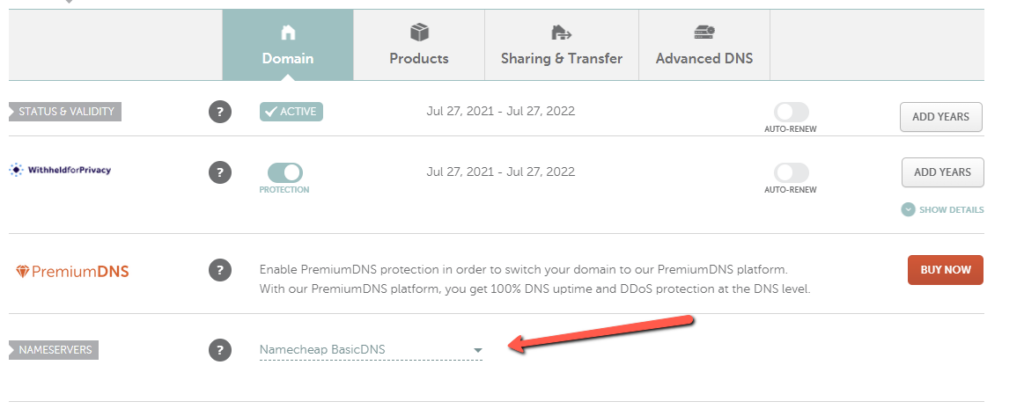
1. Purchase your domain using any domain registrar (we recommend Namecheap) – If you are using Godaddy instead of namecheap, check out this article.
2. Make sure to set the DNS to the default / standard DNS (in Namecheap it’s called Namecheap BasicDNS, and it’s selected by default, so you don’t have to do anything
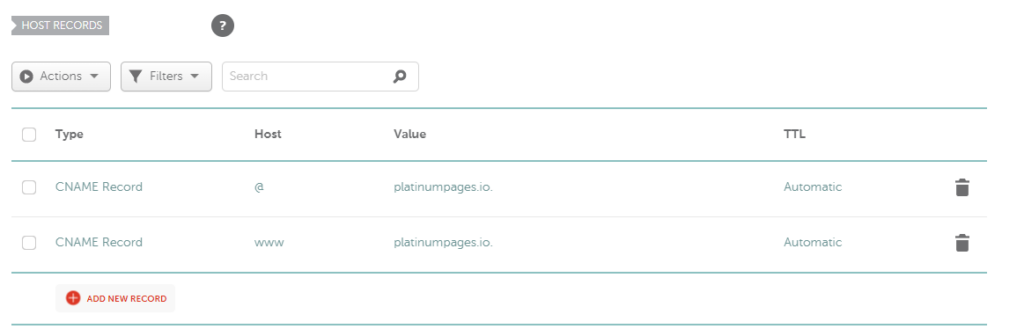
3. Add 2 CNAME records, one with host = @, Value = platinumpages.io and the other with host = www, Value = platinumpages.io
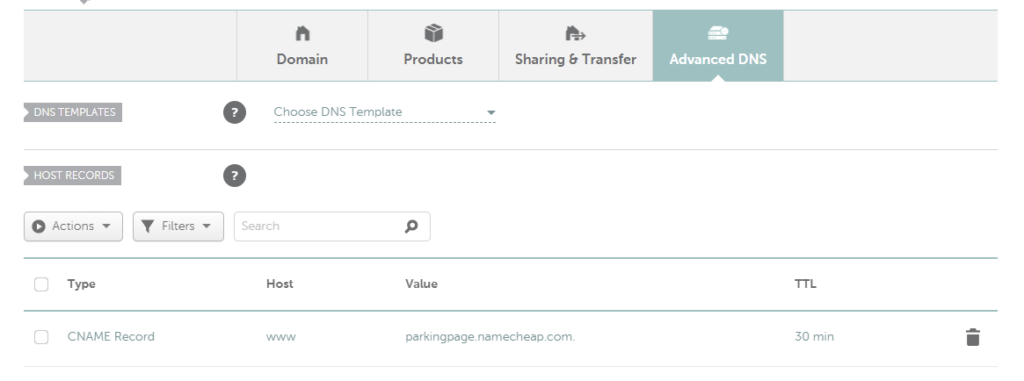
On Namecheap, you can find the CNAME records under the “Advanced DNS” tab.
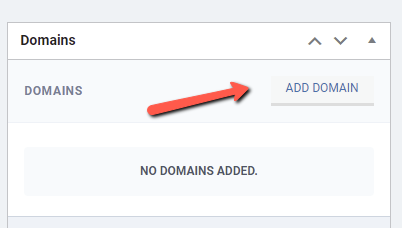
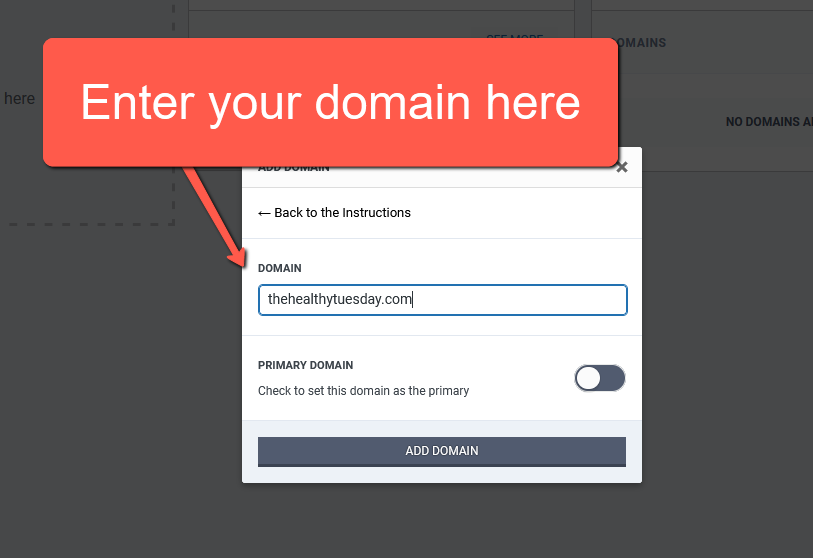
4. In the Platinum Pages dashboard for your site, click on “Add Domain”, andn in step 2, make sure to enter the same domain you have previously purchased, then click on “Add Domain”. After a few minutes, the domain should be available and you should be able to access your site via your custom domain.
If you are using Godaddy instead of namecheap, check out this article.
For a full video walkthrough, please watch video #6 here: https://members.projectplatinum.com/module-2-building-your-landing-pages/
3. How to add your pixel
You have 2 options:
a) If you want to show it on all landers on your site (include home page, etc), just click on the left menu item “Pixel Code” and paste your Pixel code on that box, then save changes. This code will show on the head of the html page, so you can use this to verify with facebook or any other code that requires any special code in the head section of the page.
b) If you want it to show just on a particular lander, when you are editing the lander, on the top right of the page click on “Landing Page Settings” and there you will find the box for the pixel. This pixel code will just show on that lander (in the head too).
If you have a global pixel, and then add one for a lander, both will show on that lander.
4. How to add the Cometly Code to your landing page
When you are editing your landing page, if you want to add the Cometly code, just do the following:
Click on the top right (Landing Page Settings), then select “Insert Cometly Code” and set it to Yes, then save changes.
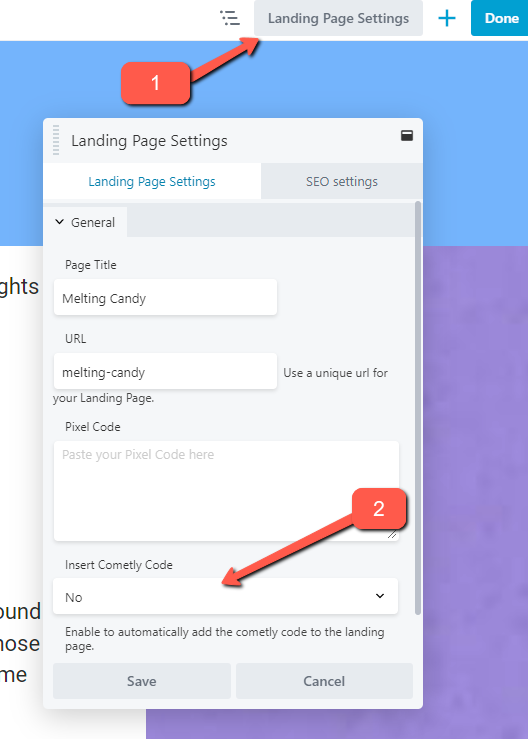
Same as with the Facebook Pixel, if you want to add the code to every single lander and page on your site, see question 3 above, section a and paste the Cometly Code manually there.
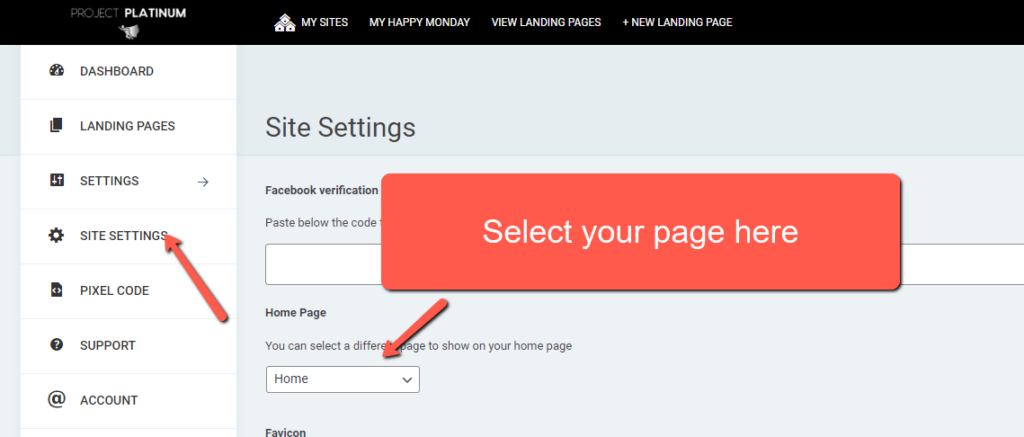
5. How to change the home page of your site
To change the page that appears when you first load your site, you need to go into your Site, then select “Site Settings” on the left menu and select the page you want in the dropdown, then click on “Save Changes” at the bottom of the page.
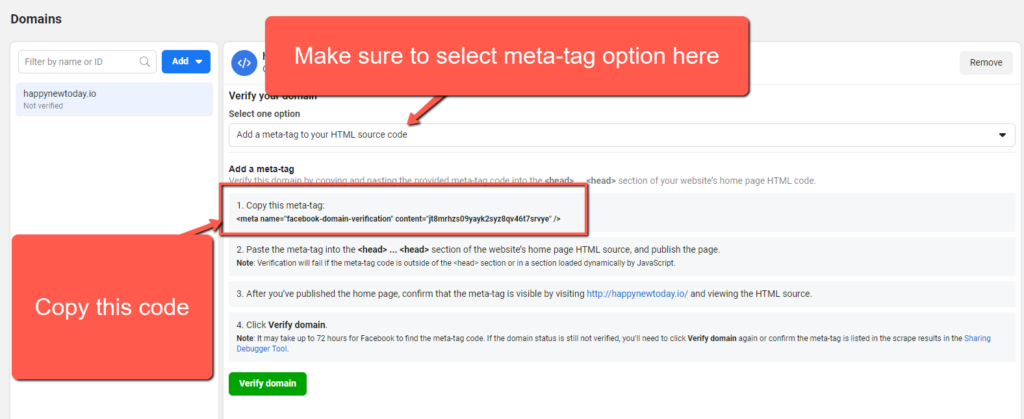
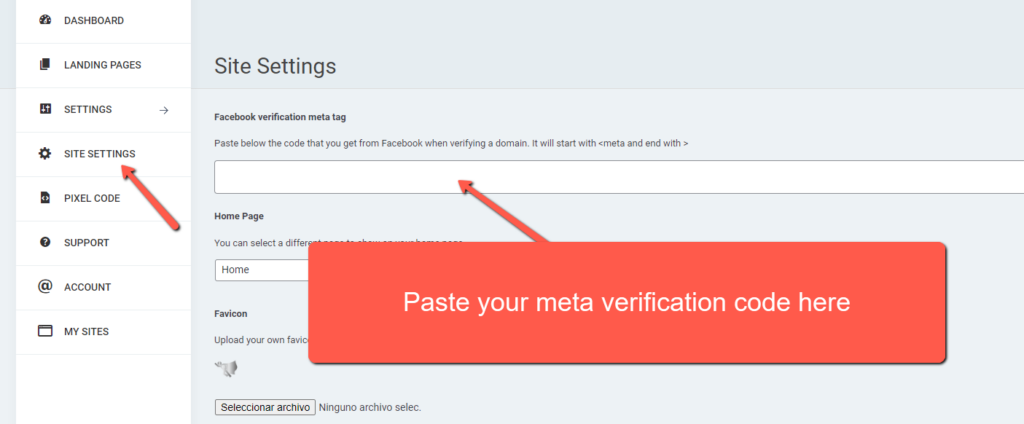
6. How to verify your domain
After you have successfully connected your site to your domain, you can copy the meta tag from facebook, then paste it inside the Site Settings section inside your site, then click on “Save Changes” at the bottom of the page. After saving changes, go back to Facebook and click on “Verify domain”. That’s all, your domain should be verified now.
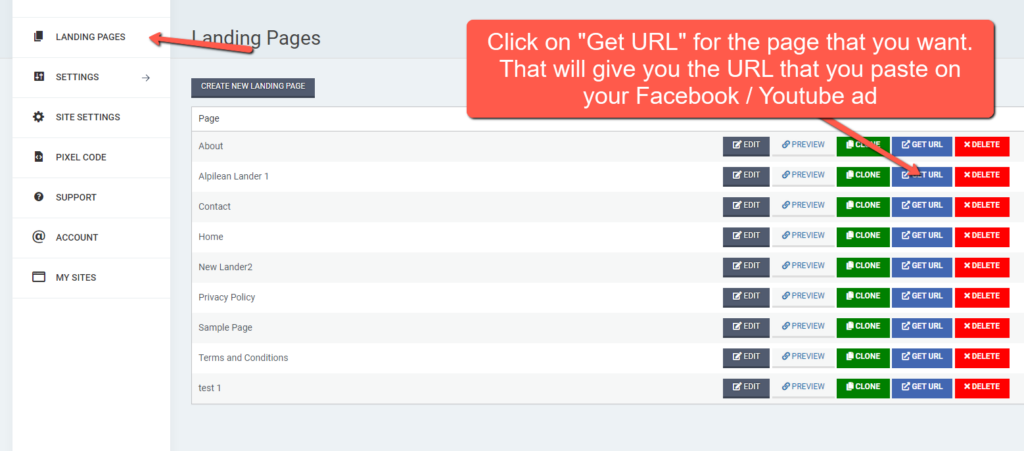
7. How do I know the url I need to use for my ad?
First, as explained in point 2, you need to connect your own domain to your site.
Once you have done this, just go to Landing Pages, and on the lander that you will use for your ads, click on “Get URL”.